The Basics of Interlocking Carpet Tiles
What Are Interlocking Carpet Tiles?
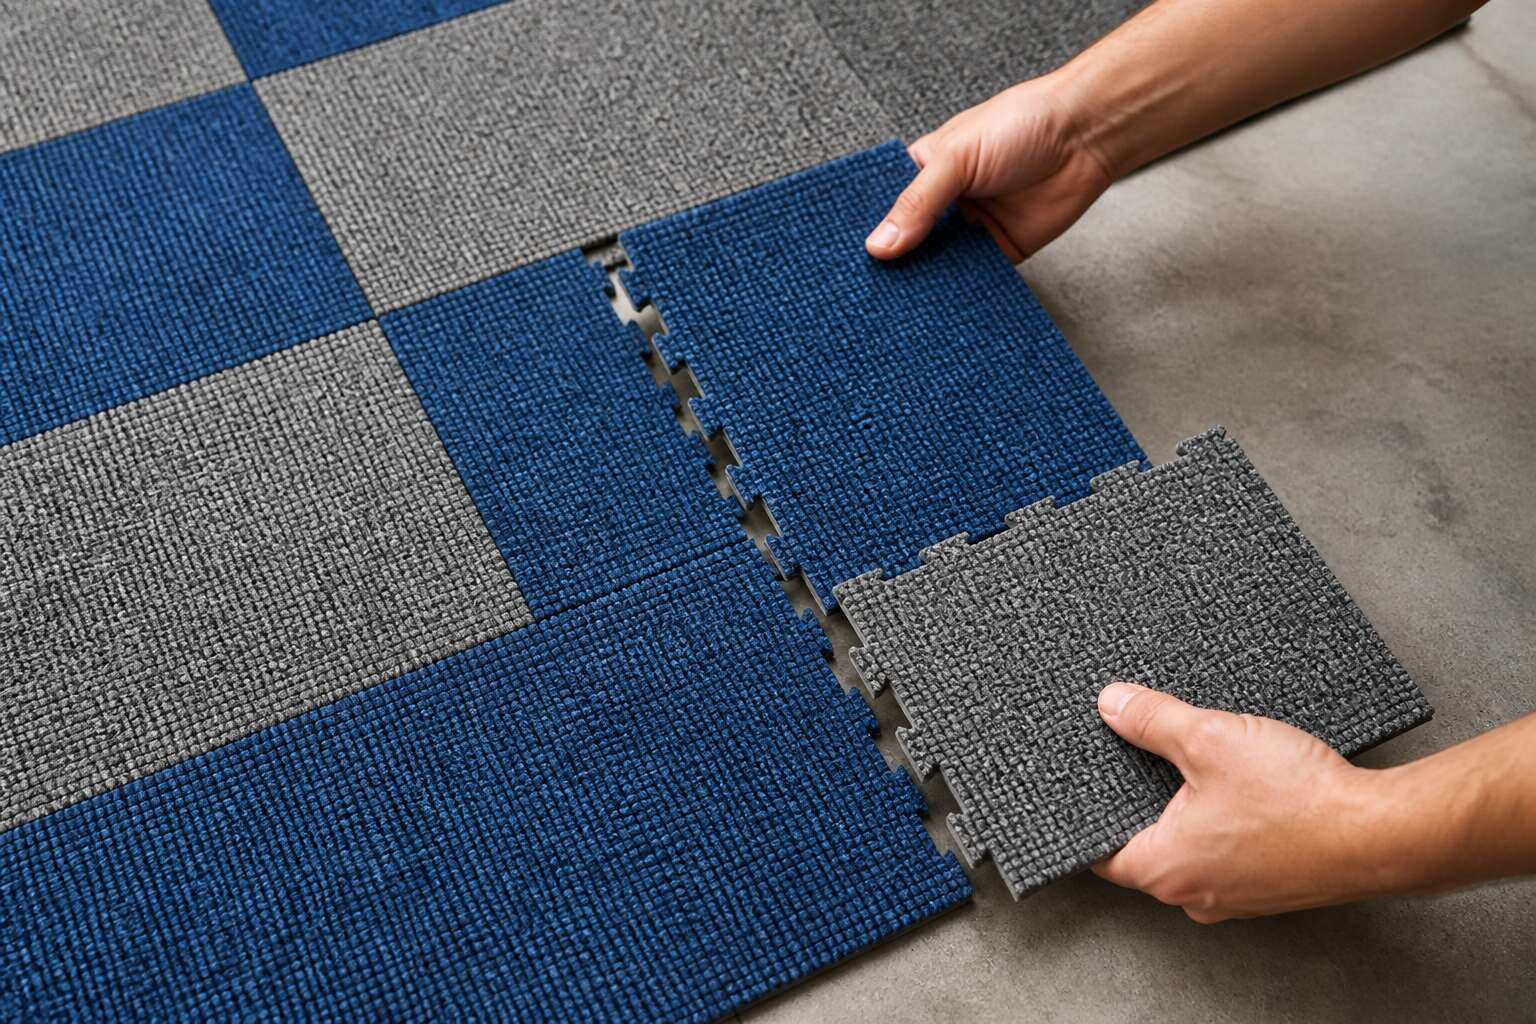
In the quiet hum of a Johannesburg office, a floor can change its story in an afternoon. Carpet tiles interlocking create that possibility. Each tile is a self-contained square of textile, fitted with a stiff backing and a clever edge that clicks into its neighbour. No glue, no waiting for adhesives to cure, no lingering smell. Carpet tiles interlocking this way form a system that answers to human hands.
These tiles are not broadloom’s distant cousin. They are a different product entirely. A loose-lay tile sits freely, while an interlocking tile grips itself. The difference matters when you need to replace a stained section or reroute a cable underneath.
- Each tile measures roughly 50 by 50 centimetres
- The backing is often bitumen or PVC
- The locking tabs align without tools
For South African homes and offices, this means a floor that adapts to load, moisture, and foot traffic without complaint.
How They Differ from Glue-Down or Peel-and-Stick Tiles
No floor reveals its true cost at installation. Glue-down tiles bond with solvent-based adhesives that demand professional removal later. Peel-and-stick tiles use pressure-sensitive backing that can fail when moisture migrates through a concrete slab. Both methods commit you to the subfloor.
Carpet tiles interlocking this way take a different approach. The mechanical tabs on each edge connect through geometry and friction, not chemistry. For a Johannesburg office with underfloor cabling, this distinction changes how maintenance happens. A stained tile lifts free without damaging its neighbours. I have seen offices replace a single tile in under two minutes!
- Glue-down installation requires trowels, curing time, and proper ventilation
- Peel-and-stick tiles need a perfectly smooth, dry subfloor
- Interlocking systems click together and lift apart without tools
Anatomy of a Tile: Backing, Fiber, and Locking Mechanism
Few objects in a modern office carry as many hidden layers as a single carpet tile. Beneath a busy weave lies a manufactured world of polymers, minerals, and engineered click mechanisms, each selected for a specific kind of abuse. For a Johannesburg boardroom or a Durban call centre, these components determine how the floor ages. The anatomy starts with the backing, often a blend of bitumen or PVC that provides dimensional stability. This layer resists curling and keeps moisture from seeping upward. Above that rests the fiber, usually nylon or polypropylene, chosen for its stain resistance and ability to hold a pattern under rolling chair traffic.
The locking mechanism is where the engineering becomes clever. Interlocking edges rely on stiff tabs that snap into adjacent tiles with a firm press. Once seated, the connection holds tight enough to prevent shifting. The system does not rely on chemical bonding. This allows the floor to contract and expand with temperature shifts without buckling. For spaces with underfloor heating, this flexibility is a quiet advantage.
1. Backing layer: Provides weight and stability, keeping tiles flat.
2. Fiber layer: Offers texture, color, and resistance to wear.
3. Locking tabs: Create a mechanical bond that separates with a simple twist.
A carpet tile interlocking system works because each layer performs a separate role. The backing holds the shape. The fiber handles daily traffic. The tabs connect the whole system without glue or adhesive mess. Understanding these parts helps when planning a new installation.
Common Materials: Nylon, Polypropylene, and Wool
When choosing carpet tiles interlocking systems, the material determines how well the floor performs over time. Two synthetic options dominate the market: nylon and polypropylene. Nylon resists crushing and recovers well from heavy foot traffic, making it a solid choice for busy offices. Polypropylene, on the other hand, is more cost-effective and naturally resists moisture, which suits areas prone to spills.
Each material brings distinct advantages. Consider what matters most for your space:
– Nylon: Exceptional durability and stain resistance
– Polypropylene: Budget-friendly and moisture-resistant
– Wool: A premium natural option with luxurious softness
Wool blends offer a more upscale feel but require more careful maintenance. The backing also plays a role here. Bitumen backing adds stability, while PVC offers flexibility during installation. Your choice should reflect the room’s activity level and your cleaning routine. For a high-traffic Johannesburg office, nylon with a bitumen backing typically wins. For a Durban home with humidity concerns, polypropylene handles damp conditions better. Match the material to the environment, and your interlocking tiles will deliver years of reliable service.
Top Benefits of Choosing Interlocking Carpet Tiles
Simple, Tool-Free Installation Process
The average South African office spends over 40% of its renovation budget on flooring alone. That is a hefty price for a surface that often needs replacing within five years. This is precisely why carpet tiles interlocking have become the go-to solution for local businesses and modern homes. The genius lies in their simplicity. You no longer need a professional installer, a bucket of toxic adhesive, or specialised cutting tools to transform a tired room.
The true advantage of carpet tiles interlocking is the peel-and-stick backing or the integrated fibre-fused system. You simply align the tile edges and press down. This mechanical bond holds firm under foot traffic, yet allows for a quick release when needed. For a business owner, this means zero downtime. You can install a 50-square-metre office over a weekend without disrupting your staff. I find that most people underestimate how much time they save by avoiding the measuring and trimming required for traditional roll carpets.
This ease of use directly translates to significant cost savings. Since the installation is tool-free, you eliminate labour costs entirely. If a tile gets stained or damaged, you do not rip up the entire floor. You just lift the single square and click in a new one. This modularity makes maintenance remarkably simple. Here are a few practical patterns you can execute with these tiles:
– Herringbone layouts for a classic, sophisticated feel.
– Checkerboard designs to hide wear in high-traffic corridors.
– Random colour flecks to create a dynamic, creative workspace.
Beyond the practical installation, the flexibility in design is a major draw. Because you are working with individual squares, you can mix colours to define specific zones in an open-plan area. You can create a border around a meeting table or a pathway leading to the exit. This is something a monolithic carpet simply cannot offer. I have seen warehouses and small studios use contrasting borders to improve safety by clearly marking walkways.
Durability is another strong point. These tiles are constructed with dense fibres that withstand heavy rolling loads from office chairs. The backing provides a cushion that reduces fatigue for employees who stand for long periods. In terms of acoustics, the dense structure naturally absorbs sound, reducing echo in large rooms. When you compare the longevity of a high-quality tile versus a budget broadloom, the tile often outlasts it by several years.
Ultimately, choosing carpet tiles interlocking is a strategic decision for anyone looking to balance aesthetics with functionality. It puts the power back into your hands. You can start small, install a single accent area, and expand as your budget allows. No glue, no mess, no waiting for fumes to clear. It is a straightforward, logical upgrade that respects your time and your wallet, making it a smart choice for the resourceful South African property owner.
Portability and Reusability for Renters and Temporary Spaces
Renters face a peculiar conundrum: invest in flooring that belongs to the landlord, or live with scuffed concrete? Interlocking carpet tiles offer a third path! Their portability means you can lift your entire floor and take it to your next address. This is not the flimsy peel-and-stick variety; the fibre-fused locking system holds firm during daily life, yet releases cleanly with minimal fuss. For temporary spaces like exhibition booths or pop-up shops, this reuse factor transforms flooring from a sunk cost into a movable asset.
I have seen retrenched professionals repurpose a small office’s tiles into a home study within an afternoon, no residue, no damage to the underlying screed. Because interlocking carpet tiles do not require permanent adhesive, landlords rarely object. You simply align, press, and when the lease ends, you stack them into a rental trailer. Weighing less than broadloom remnants, each tile handles easily. That longevity across multiple homes makes them an economical choice, particularly in a volatile rental market.
Easy Replacement of Damaged or Stained Squares
A rogue stiletto heel or a tipped-over potplant can instantly ruin a pristine carpet. With a traditional wall-to-wall fit, that blemish means a costly, inconvenient repair. But with modular flooring, the solution is remarkably straightforward. The secret lies in the design. Each square operates independently, so a single damaged section doesn’t compromise its neighbours. You can perform a one-tile swap in minutes, without calling in a professional or breaking the bank.
The process is cleaner than you might expect. You simply unlock the edges using a specialised tool, lift the affected tile, and slide in a fresh replacement. The patented fibre-fused locking system clicks back into place with a satisfying precision. In a busy household with kids and pets, this is a game-changer. You can keep a spare box in the garage and restore a flawless finish in the time it takes to boil the kettle. This modular practicality is why carpet tiles interlocking systems have become the preferred choice for practical South African homes, particularly in high-traffic areas like the passage or a home office in Johannesburg. It transforms a potential crisis into a ten-minute chore, ensuring your floors always look their best without a hefty service fee.
Design Flexibility with Mix-and-Match Patterns
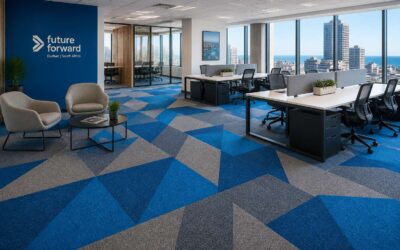
Picture a blank canvas. Not in a gallery, but on the floor of a bustling Johannesburg office. You have a vision for that space, a specific palette that speaks to your brand’s energy. Traditional broadloom forces you into submission, a single, monolithic slab of colour. Carpet tiles interlocking offer a different kind of freedom. They are the artistic medium for the modern floor, allowing you to paint with geometric patterns, borders, and colour blocks that guide the eye through a room. It is a way to design with intention, creating bespoke aesthetics that were once the exclusive domain of high-end commercial architects.
The true genius of this flooring solution lies in its modular nature, which transcends mere appearance. Think about the rhythm of a busy workspace or a family home with high traffic. Certain areas, like the passage leading to a home office or the space under a conference table, bear the brunt of daily life. With a fixed carpet, wear becomes a permanent, unsightly scar over time. However, with a modular setup, you hold the power of renewal in your hands. The ability to rotate or replace individual squares means you can redistribute the wear, ensuring the entire floor ages gracefully and evenly, rather than succumbing to premature bald patches in high-traffic zones.
Beyond the visual and practical longevity, the design flexibility extends to the very boundaries of a room. Creating a transition between two different spaces, such as a sleek kitchen and a cosy lounge, no longer requires a complicated transition strip. You can execute a clean, elegant curve or a sharp geometric break directly with the tiles themselves. This capability allows for a seamless integration of spaces, making your home feel larger and more cohesively designed. For business owners in Cape Town or Durban, the ability to imprint a logo directly into the floor in the reception area is a powerful branding tool that is both durable and impressive.
This concept of flexibility also invites a more personal touch. You are no longer limited to the rolls of carpet that a retailer happens to stock. Instead, you can curate a collection of tiles that mix textures, patterns, and shades. The result is a floor that is not just a surface but a statement. It reflects a considered approach to interior design, one that values both form and function. The intention behind each layout is yours, and the execution is simple, making it accessible for homeowners and facility managers alike.
The benefits of this approach to flooring are numerous and touch on every aspect of ownership.
– Aesthetic versatility allows for unique patterns and zoning.
– Simple maintenance means any single tile can be cleaned or replaced without disruption.
– The access to subfloors is straightforward, perfect for offices with underfloor cabling.
– The durability of individual pieces means the floor’s life is extended indefinitely.
Ultimately, the choice of carpet tiles interlocking represents a shift in how we think about the floors beneath our feet. It is a move away from passive, permanent fixtures towards active, manageable components of our environment. This is about creating a floor that is as dynamic as the life happening above it, adapting to your changing needs, your design whims, and the inevitable wear and tear of daily existence. It is a practical, stylish, and intelligent investment in the spaces where we live and work.
Improved Acoustics and Comfort Underfoot
They say silence is golden, but in a bustling office, it is rarer than a parking spot in Sandton. The acoustic nightmare of a hard floor is the lesser-discussed villain of modern design. Echoing footsteps, the clatter of a dropped pen, the entire office knowing you are approaching. It is a symphony of distraction. Carpet tiles interlocking actively solve this problem. The dense fiber and backing of quality tiles intercept and absorb the noise, not just within the room, but also preventing sound from travelling to the floor below. You get the quiet of a library, minus the stern librarian.
The comfort factor is just as critical. Standing on a concrete slab or ceramic tile for eight hours is a form of low-level torture. The resilient cushioning of the tiles provides a spring in your step that is noticeable within minutes. This is not just about the soles of your feet. It extends to your knees and your back, reducing fatigue so you can focus on your tasks instead of your aching joints. The benefits are tangible:
– Reduces ambient noise levels by absorbing sound waves and decreasing echo.
– Provides thermal insulation, keeping the floor warmer in winter.
– Offers a softer surface that reduces strain on joints and legs.
This combination of quiet and comfort transforms a space. It changes a room from a sterile, echoing box into a warm, contained environment. The floor becomes an active participant in your wellbeing, a silent partner in your productivity. With carpet tiles interlocking, you are not just covering the floor, you are engineering the atmosphere. Your feet will thank you, and your ears will too.
Step-by-Step Guide to Installing Interlocking Carpet Tiles
Preparing the Subfloor: Cleaning and Leveling Essentials
According to flooring installers, over 80 percent of premature floor failures trace back to subfloor preparation. That statistic makes this work non-negotiable. Start by removing furniture and sweeping with a broom. Then run a straightedge across the floor to find high and low spots.
Concrete slabs require a flexible patching compound for cracks. Timber substrates need loose boards screwed down. If you spot moisture stains, perform a plastic sheet test. Tape plastic to the concrete for 24 hours. Any trapped condensation means you need a damp proof membrane before proceeding.
A clean, level base lets your carpet tiles interlocking edges click together. Tighter seams produce a better appearance. This stage determines whether your installation looks seamless or shows every imperfection beneath.
Before laying, run through this checklist:
- Vacuum thoroughly, including corners
- Remove protruding nails or staples
- Ensure the surface is dry
Your carpet tiles interlocking performance depends on the subfloor.
Planning Your Layout and Determining Tile Direction
A grid is a map, and the squares are your territory. Before you press a single tile down, view the room as a camera architecture. More than 70 percent of installers start from the geometric center of the space, not the wall. Snapping a chalk line across the middle gives you a true reference point. This technique ensures that any cut edge gets pushed to the perimeter, where furniture or skirting will hide it.
The orientation of the weave matters. Because light pours in from windows, a single direction creates a directional grain that is glaringly obvious. For a uniform sweep, lay all the arrows the same way. However, if you want a bespoke midfield element or a checkerboard effect, you must plan that quadrant before you start, as the locks only engage when the perimeter of each square aligns.
To determine the direction and starting point, use this sequence:
1. Measure the room’s length and width at their widest points.
2. Mark the midpoint on each wall and snap intersecting chalk lines.
3. Test the lock on two tiles without adhesive to check the arrow orientation.
4. Shift the grid 5 centimeters to avoid a narrow sliver cut against the wall.
Shifting the grid slightly, called the rule of thirds, prevents a pitfall where the last row shrinks to a thin strip. A tight space makes the locking mechanism awkward to seat. By planning this shift, you ensure the carpet tiles interlocking edges find purchase without force. This careful choreography saves you the frustration of a compromised corner later.
Starting from the Corner and Working Outward
Starting from a corner is a different philosophy from the center-grid method. You press the first tile flush against the wall junction and let the carpet tiles interlocking edges find their own path. Each square seats with a firm click, and the pattern extends outward.
Here is the sequence I use:
- Check the corner with a carpenter’s square. Most walls are not perfectly 90 degrees.
- Trim the first tile if needed, but only the side that touches the wall.
- Work in a fan pattern, not a straight line. This keeps pressure even.
- Tap each tile gently with a rubber mallet to seat the locks fully.
Errors accumulate toward the opposite wall, where furniture usually hides them. Small adjustments are normal. The carpet tiles interlocking system forgives a millimeter here or there, but not a centimeter. Work slowly, and the floor will reward you!
Joining the Tiles Securely: Locking Techniques
The click is the quiet promise of a job done right. When you press two squares together, that sound means the locking mechanism has engaged, and you have created a bond that will hold without a single drop of glue. The success of your entire project depends on this moment, and it is worth slowing down to get it right.
The first rule of carpet tiles interlocking is that alignment precedes pressure. Do not force a joint that is not flush. Look closely at the edge where the tiles meet. If one side sits higher, the lock will not engage cleanly. Gently rock the tile into place, feeling for the moment when the male and female edges align. When they do, a firm press from the center outward will click it shut.
Work in a deliberate pattern rather than hopping around the room. I find it best to install a small section, maybe three by three tiles, and then check every seam for uniformity. If a corner has lifted, I press it down with my thumb. If the gap persists, I release the tile and realign it. A locked tile that is not perfectly seated will create a cascade of problems, pushing every subsequent row out of square. One stubborn millimeter today becomes a ragged seam tomorrow.
Here is the rhythm that works for me:
– Position the tile without letting it touch its neighbor.
– Slide it into place with a slight forward motion, not straight down.
– Press firmly at the interlocking edge, then move across the surface.
– Listen for the click and feel for the flush transition.
Do not rush this process. Each tile deserves a few seconds of attention. The locking system on quality carpet tiles interlocking products is robust, but it is not magic. It rewards patience and punishes haste. When you complete a row, run your hand across the entire surface. Your palm will detect any subtle rise that your eyes missed. Fix it now or live with it later, those are your only two options.
A successful installation feels solid underfoot. There is no shifting, no rattle, no flex. That stability comes from the quality of the locking system and the care you took in seating every single joint. Get this right, and the rest of the room falls into place with satisfying certainty.
Cutting Tiles for Perimeters, Doorways, and Obstacles
Most people worry about the middle of the room. They fret over the layout and the pattern. But the real test of your skill happens at the edges. That is where the wall meets the floor, and where doorways create their own specific challenges. Cutting carpet tiles interlocking systems for these areas is not difficult, but it demands a different kind of patience.
You need the right tools for a clean edge. A sharp utility knife with fresh blades is non-negotiable. A straight edge or a carpenter’s square is also essential. Do not guess. Measure twice, and mark your line with a pencil. For a perfect fit against the wall, use a technique called scribing. Place the tile upside down on top of the tile next to it. Take a spare block of wood, press it against the wall, and run a pencil along the block. This transfers the wall’s contour directly onto the tile. Cut along that line.
Cutting Techniques for Doorways and Obstacles
For door frames and posts, you are not just dealing with a straight line. You need a cut that wraps around the obstacle. The best way to do this is to create a paper template. It sounds slow, but it saves material. Cut a piece of paper the same size as the tile. Place it where the tile will go. Use a pencil to trace the outline of the obstacle onto the paper. Then, transfer that shape to your tile.
– Always cut from the back of the tile to protect the visible surface.
– Use a straight edge as a guide to prevent the blade from wandering.
– Make sweeping, continuous strokes rather than pressing hard.
– For curved cuts around pipes, use a compass to mark the radius.
Here is a simple process that works for most obstacles. First, measure the depth of the obstruction. Second, mark this distance on the tile from the edge that will meet the wall. Third, cut that section out. Then, place the tile back into position and trace the exact shape of the post or pipe onto the tile. Cut along your trace line. This creates a perfect fit every time.
Remember that cutting carpet tiles interlocking products correctly is what separates a professional finish from a DIY giveaway. A ragged edge will be visible. A gap will collect dust and dirt. Take your time. Use a fresh blade in your knife for every few cuts. A clean cut is a safe cut for the material. And when you are manoeuvring those pieces around obstacles, the core principle stays the same: measure, mark, cut, and fit. That process, repeated accurately, is your best ally. When you finish the last corner, look back at your work. The straight lines and the snug fits around the door frame are what make the entire floor look intentional. That is the reward for getting the details right.
Finishing Touches: Trim Pieces and Transition Strips
Excellent. I will build upon the previous sections and guide you through the final and most crucial steps, ensuring the installation is not only functional but also looks professionally finished.
The installation of the main field of carpet tiles interlocking is a rewarding achievement. However, the true craftsmanship is revealed in the finishing touches, where the floor meets the walls and doorways. This is where you transition from a functional surface to a polished feature of your room. These final details protect the edges of your installation from wear and tear, while also providing a clean, deliberate line that frames your work.
To begin this final phase, you will need to gather your transition strips and trim pieces. These are not mere afterthoughts; they are the architectural details that hide the raw edges of your tiles and accommodate changes in floor height. You will typically need a transition strip for doorways that lead to other rooms, especially if you are joining the tiles to a different type of flooring. For areas where the tiles meet a hard surface like a concrete slab or a wooden floor of a different height, an end-bar or a reducer is the appropriate choice.
Before you begin, measure the width of each doorway and the length of any walls where the tiles terminate. This will give you the lengths you need to cut your transition strips. When cutting metal or wooden transition strips, a hacksaw with a fine blade is your best tool. It provides the clean, straight cut necessary for a seamless butt joint. For vinyl or rubber strips, a heavy-duty utility knife and a straight edge will suffice. Remember the precision from your earlier cutting exercises; the same calm hand and sharp blade apply here.
Once your strips are cut to size, position them. For a doorway, the transition strip should be centered under the door when it is closed. This ensures a balanced look from both sides of the threshold. The process is straightforward:
1. Apply a thin, continuous bead of construction adhesive to the subfloor where the transition strip will sit.
2. Press the transition strip into place, giving it a slight wiggle to ensure good contact with the adhesive.
3. Wipe away any excess adhesive that squeezes out from the sides immediately.
If your transition strip came with a track, you will first screw or glue the track down, and then snap the top piece into place. This is a cleaner method and allows for easy replacement of the strip if it ever gets damaged. For the final wall edges, you will use quarter-round or baseboard trim. These are fitted against the wall, covering the small expansion gap between the wall and the tiles. Cutting these for inside and outside corners is the last test of your measuring skills. A mitre saw is the best tool for this job, allowing you to cut precise 45-degree angles for a tight, professional corner joint.
With the trim secured, your floor is complete. The last corner looks intentional, the edges are secure, and the transition between rooms is seamless. You have built more than just a floor; you have created a durable, beautiful foundation that respects the space around it.
Maintenance and Longevity of Interlocking Carpet Tiles
Daily and Weekly Cleaning Routines for High-Traffic Areas
A single muddy footprint can track through a busy hallway in seconds, yet the true test of any floor covering begins long after the footprints fade. The resilience of carpet tiles interlocking systems lies not just in their construction, but in the consistent care they receive. In high-traffic zones, where daily footfall is relentless, the difference between a tired-looking floor and a vibrant one often comes down to a simple vacuuming schedule. I have seen open-plan offices transform simply by sticking to a routine that removes abrasive grit before it can work its way into the fibres.
Daily attention is the cornerstone of longevity, particularly for those areas near entranceways and corridors. A swift pass with a commercial-grade vacuum, focusing on the seams where dirt tends to accumulate, prevents premature wear. For the weekly deep clean, you should consider the specific demands of your space. A structured approach ensures no section is neglected.
1. Start by removing all furniture and loose items to access the entire surface.
2. Vacuum thoroughly in multiple directions to lift embedded soil.
3. Spot-treat any stains immediately with a manufacturer-approved solution.
4. Use a dry extraction cleaning system to avoid over-wetting the backing.
5. Allow the area to dry completely before returning furniture to its position.
The true beauty of this flooring solution is that maintenance rarely requires a full replacement. If a particular tile suffers from a stubborn spill or heavy scuff, the modular nature of the design allows you to swap out a single unit. This targeted approach not only saves money but also extends the life of the entire installation, proving that a proactive cleaning ritual for your carpet tiles interlocking setup is an investment in its future, keeping the space welcoming without the need for extensive downtime.
Effective Spot and Stain Removal Techniques
Industry data shows that 70% of premature carpet tile replacement comes from stains, not normal wear. For South Africans dealing with red clay mud and braai spillages, a quick response preserves your carpet tiles interlocking setup. Always blot, never rub. Use this order:
- Blot with a clean white cloth.
- Mix a drop of dish soap with cold water.
- Dab from the edge inward.
- Rinse then blot dry.
Afterwards, inspect the tile edge. Excess moisture can loosen the locking strip of your carpet tiles interlocking system. A hand-held extractor removes deep marks, but always dry overnight with a fan to protect the backing.
For longevity, place mats at entrances to catch abrasive dirt. Rotate heavily used tiles every few months. Book a professional deep clean twice a year to pull out oily residue. These steps will keep your floor looking fresh and reduce costly replacements.
Protecting Against Furniture Indentations
Furniture is often the unsung hero of our living spaces, yet it poses a quiet threat to your flooring. While stains account for a large portion of premature tile failure, the relentless pressure of a heavy sofa or desk leg can be just as damaging. The dense fibres of carpet tiles interlocking systems are designed for resilience, but they are not immune to the crushing weight of furniture. Indentations appear gradually, leaving permanent dimples that are difficult to reverse once the damage is done.
Prevention is your strongest defence. Placing protective cups or glides under the feet of heavy furniture distributes the weight more evenly across the surface. This simple measure is especially crucial for pieces that remain stationary for months at a time. If you must place a heavy item on a tile, consider using a large, flat plywood board as a base to spread the load. It is far easier to prevent a depression than to attempt a repair after the fact.
Cleaning also plays a vital role in maintaining the structural integrity of the tile backing. When dirt particles become embedded, they act like sandpaper, weakening the fibres and the lock between tiles. A weekly vacuum with a beater bar is the bare minimum, but a deeper clean every few months will refresh the pile and restore its bounce. After cleaning, ensure the tiles dry completely before moving furniture back into place to prevent moisture from seeping into the interlocking seams.
Finally, remember that even the best floor needs a break. Rearranging your layout every so often shifts the pressure points and gives the pile time to recover its natural loft. By rotating your rugs and moving heavy pieces occasionally, you allow the carpet tiles interlocking system to breathe. This proactive approach protects your investment and keeps the surface looking uniform for years, proving that a little attention goes a long way in preserving both beauty and function.
When and How to Replace Individual Tiles Without Full Removal
The true value of any flooring reveals itself over time. When you choose carpet tiles interlocking for your space, you are making a commitment to longevity. The lifespan of these tiles is often measured in decades, but reaching that milestone depends entirely on the care they receive. The modular nature of this flooring is its greatest strength, but it also requires a thoughtful approach to maintenance that goes beyond simple aesthetics.
Regular upkeep is the quiet work that preserves the vibrant appearance of your floor. A consistent routine of vacuuming removes the abrasive grit that traffic drags in. This is the first line of defence against the dulling of fibres. Yet, the true genius of carpet tiles interlocking lies in their response to deeper issues. Unlike broadloom, which can be a permanent stain reminder, these tiles allow for a surgical response to accidents. When a spill occurs, you are not faced with a costly, room-wide cleaning bill. Instead, you focus on a single square.
The Art of the Strategic Swap
The process of replacing a damaged tile is surprisingly simple, a task that most people can master in minutes. Here is what that entails.
1. Lift the affected tile. Use a flat tool like a putty knife to gently pry up the corner.
2. Disengage the locking mechanism. Work your way around the edges to release the tile from its neighbours.
3. Clean the subfloor. Remove any debris or old adhesive remnants from the area to ensure a flat surface for the new tile.
4. Install the new square. Position the fresh tile and press it firmly into place, snapping the locks securely.
This ease of replacement is the definitive advantage of the interlocking system. It empowers you to maintain a flawless floor without needing to employ a professional or order a full roll of carpet. The economy of this solution is obvious; you purchase a single tile, not a whole room. This proactive approach to managing wear and tear ensures that your floor looks curated and cared for, not merely lived on.
In the end, the maintenance of these tiles is a simple equation. Swift action on spills and a willingness to swap out the occasional square are all that is required to protect your investment. The floor keeps its structural integrity and aesthetic appeal, proving that durable design is also the most practical choice for the modern home.
Choosing the Right Interlocking Carpet Tiles for Your Space
Assessing Traffic Levels and Durability Requirements
A heavy footfall count of over 1,000 people per day demands a different flooring strategy. I see it often in South African offices, schools, and retail spaces, where traffic levels vary wildly between corridors and quiet corners. Your durability requirements should follow those patterns, not a single blanket assumption.
For high traffic zones, look for carpet tiles interlocking with dense polyamide or solution dyed nylon fibers. These resist crushing and fading. For low traffic areas, polypropylene offers an economical balance. Consider these factors when matching tiles to zones:
- Weight and roller load from trolleys or chairs
- Frequency of cleaning and maintenance access
- Moisture exposure near entrances or kitchen areas
Matching the tile construction to the actual footfall extends the entire floor’s lifespan. Carpet tiles interlocking allow you to mix grades across a single space, using heavy duty squares only where needed. That targeted approach keeps costs down without compromising performance.
Comparing Thickness, Density, and Pile Height Options
The quietest difference between a distinguished office and a tired one often sits at ankle height. Thickness, density, and pile height determine whether carpet tiles interlocking feel substantial underfoot or merely decorative. Thickness gives the tile body. Density gives it resilience. Pile height gives it character, and too much character in a busy passage means visible flattening within months.
When comparing carpet tiles interlocking, these three measurements work as a team rather than a competition. A thick tile with low density compresses under a filing cabinet. A dense tile with short pile handles castors and trolleys admirably but offers little acoustic comfort.
Some useful comparisons:
- Pile height of 5mm to 6mm suits rolling loads and office chairs
- Density around 2200 g/m² resists permanent indentation
- Overall thickness of 8mm to 10mm masks minor subfloor undulation
A tile that succeeds in one measurement alone will still disappoint in practice.
Evaluating Tile Size and Coverage for Efficient Layout
Choosing the right carpet tiles interlocking begins with a simple question: how much floor do you actually need to cover? I have watched many buyers grab the first appealing sample without measuring their space. That mistake leads to awkward partial rows and wasted material. Tile size changes everything. A 50cm square suits small offices and rental flats. A 60cm tile covers more ground with fewer seams, which means less visual clutter in large boardrooms.
Here is what I check before ordering:
– Divide the room length and width by the tile size to confirm whole tiles along the main walkways.
– Add 10% extra for cuts around doorframes and future damaged squares.
– Verify the lock mechanism aligns when tiles are turned 90 degrees.
Evaluating coverage is really about matching the tile footprint to the room’s shape. Larger carpet tiles interlocking reduce cutting time, but smaller tiles handle awkward corners more gracefully. Measure twice, order once, and the layout will reward you.
Selecting Colors and Textures to Match Your Décor
Choosing the right colour and texture for your space is a bold statement about your brand or your home. The beauty of carpet tiles interlocking is that they grant you the freedom to paint with fabric, testing a bold hue in a low-traffic corner before committing to the full layout. This modular approach takes the fear out of permanent decisions.
Texture is the silent language of a room. A dense, loop-pile construction offers a sleek, professional finish that stands up to the constant roll of office chairs, while a cut-pile texture introduces a softer, more luxurious touch underfoot for a lounge or reception area. Consider the atmosphere you want to create; a high-traffic corridor might benefit from a patterned tile that cleverly disguises daily wear and tear.
When you are sifting through swatches, think about the interplay of light and shadow. A dark, charcoal tile in a boardroom can absorb light and create an intimate, focused environment. Conversely, light greys and warm sands reflect available sunlight, making a small office or apartment appear larger and more welcoming.
Here are a few practical pointers we always keep in mind:
1. Check the Wear Layer: For commercial settings, look for a heavier wear layer to ensure the pattern and colour stay vibrant for years.
2. Order a Sample Tray: Never rely on a screen. View the carpet tiles interlocking you like on your actual floor and under your specific lighting conditions.
3. Plan for Muted Bases: If you love accent colours, use them sparingly. Use neutral tones for the main field and vivid tiles to define zones or create a feature wall.
Ultimately, the goal is to select a palette that feels intentional. The right texture and tone will not only enhance the acoustics of a room but also its entire mood, creating a foundation that is both durable and distinctly yours.

0 Comments